I accidentally deleted important photos and videos from my SD card while clearing space, and now I really need help getting them back. The card was in my camera, and I stopped using it right away because I heard that can improve SD card data recovery chances. What’s the best way to recover deleted files from an SD card without causing more data loss?
Stop using the SD card. Right now.
Pull it out of your phone, camera, drone, whatever had it mounted. Put it aside and do not shoot one more photo or video on it. I learned this the hard way once with a vacation card, and the ugly part is simple. Deleting a photo usually does not wipe the photo data first. The device drops the file entry, marks the space as free, and leaves the old bits sitting there until new data lands on top of them. Once you write new stuff to the card, recovery odds drop fast. Sometimes to zero.
Before you install anything, check the easy places.
If the card was in a phone, open your gallery app and look in Recently Deleted or Trash. If you used the card with a PC before, look in the Recycle Bin. Also check cloud sync you forgot was on, stuff like Google Photos or OneDrive. I have seen files look ‘gone’ when they were only hidden, so turn on hidden files in your file browser and take a quick look. It takes a minute.
If the files are gone from the card itself, you need recovery software. Skip CHKDSK on Windows. Skip First Aid on macOS. Those tools repair file system problems. They are not meant for pulling deleted photos back. On damaged media, they sometimes make the mess worse. I would not touch them for this job.
Free options exist, but there are tradeoffs.
PhotoRec and Windows File Recovery cost nothing. I tried both. They work, sort of, but they are clunky and easy to mess up if you are not used to terminal tools. PhotoRec also tends to dump recovered files into big piles with stripped names and no folder structure, so then you get to sort hundreds or thousands of files by hand. Recuva is easier to click through, but I had rough results with RAW formats. NEF and CR2 were the ones I saw fail most often, with previews missing or files opening half-broken.
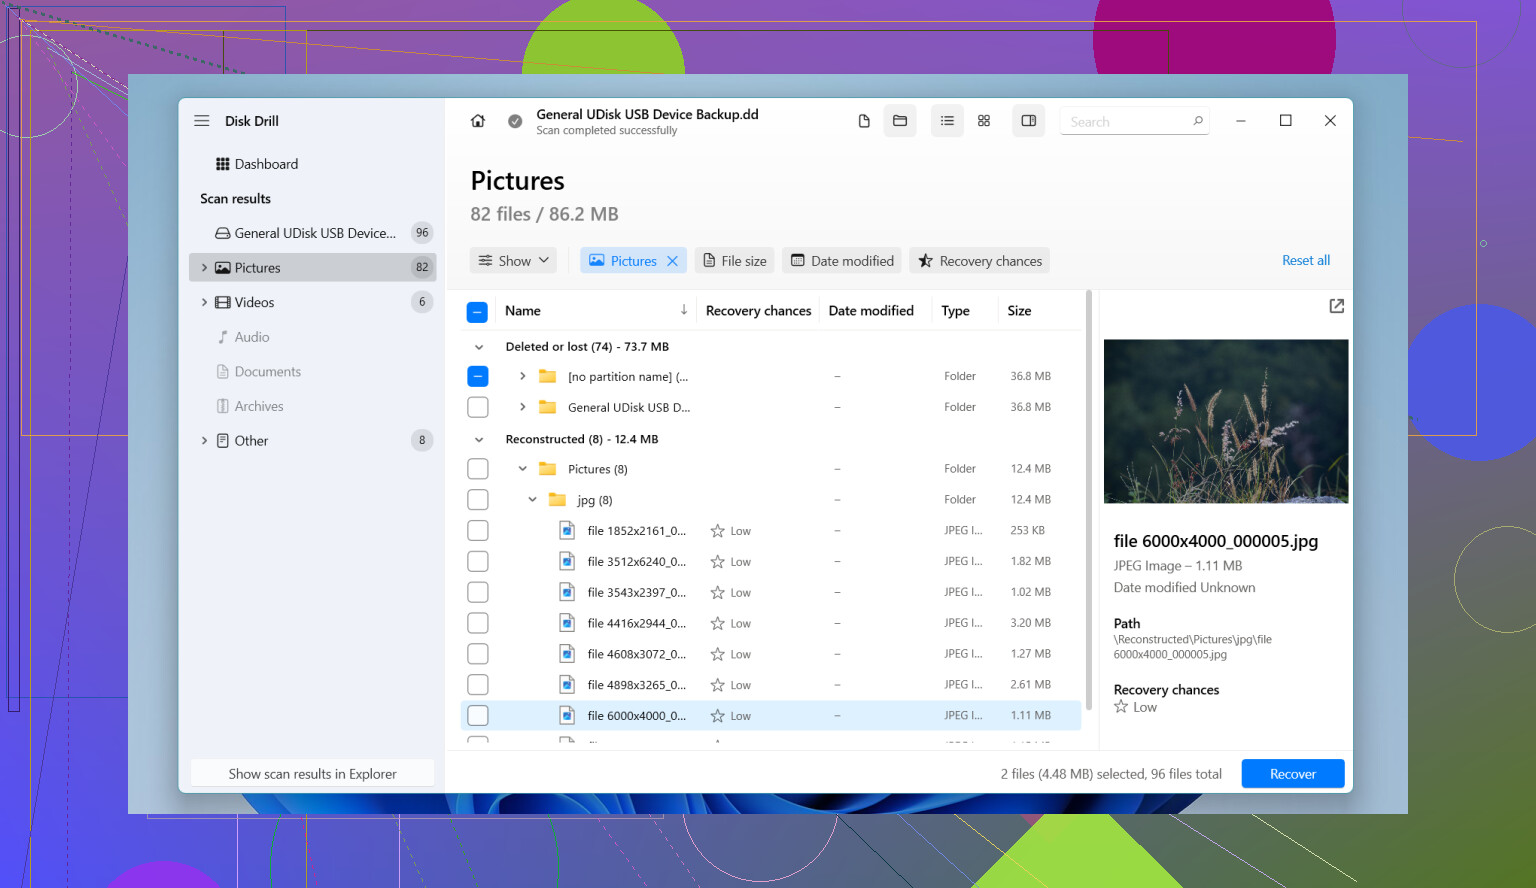
The tool I had the best luck with for SD cards was Disk Drill.
I know people argue about recovery apps nonstop, but this one gave me the least friction. The part worth using for cameras is Advanced Camera Recovery. It did a better job on fragmented clips and RAW photos than the lighter free stuff I tested.
What I would do:
- Install Disk Drill on your Windows PC or Mac.
- Insert the SD card with a dedicated card reader. Do not hook up the camera over USB if you can avoid it. A lot of cameras expose storage in a limited transfer mode, and recovery apps get less direct access.
- Launch the app, pick the SD card, then start a lost data scan. If you only care about photos and video, use Advanced Camera Recovery.
- Wait. Bigger cards take longer. Slow cards take longer too.
- Preview the files it finds. This part matters. If the image opens cleanly in preview, your chances are good. I use preview to avoid restoring garbage files by mistake.
- Select what you want and recover it.
One thing people still get wrong at the worst possible moment: do not save the recovered files back to the same SD card.
Save them to your computer’s internal drive or to another external drive. If you recover onto the same card, you risk overwriting the exact sectors you are trying to rescue. Seen it happen. It sucks.
After you’ve copied everything off and checked the files open fine, then format the SD card in the camera if you want to reuse it. Not before. If no new photos were taken after deletion, your odds are usually decent. If the card kept being used, results get messy fast.
1 Like
You did the most important part already. You stopped using the card.
I agree with @mikeappsreviewer on avoiding new writes, but I’d add one thing first. Make an image of the SD card before you scan it, if you have the space. Use a byte-for-byte copy tool like USB Image Tool on Windows or dd on Mac/Linux. Then run recovery on the image, not the original card. If the card has weak sectors or starts failing, you still get one clean shot. People skip this step and regret it.
A few practical points.
-
Check the card’s lock switch.
Some SD cards get weird if the switch is half-moved. Put it in locked mode before plugging it into a reader, so nothing writes to it by accident. -
Look at the file system health without repairing it.
On Windows, open Disk Management. On Mac, open Disk Utility. If the card size looks wrong, or shows as RAW, or asks to format, stop. That points to file system damage, not only deletion. Recovery still works often, but you want read-only handling from here. -
If the photos were shot on a camera, sort recovered files by signature, not by folder.
Deleted camera files often lose names first. The image data stays. Recovery tools that scan by file headers tend to pull more JPG, CR3, NEF, ARW, MP4, MOV files than tools trying to rebuild folders. Messy, yes. Better hit rate too. -
Pay attention to video size.
Photos recover easier than video. Long 4K clips get fragmented on SD cards. If a recovery app shows your video as a few KB or with the wrong duration, skip restoring that copy first and try a deeper scan. -
Recover to a different drive with lots of free space.
A 128 GB card often needs more than 128 GB free during recovery if previews and temp files pile up. People run out of room mid-scan. It’s dumb, but it happnes.
If you want the least hassle, Disk Drill is a solid pick for SD card photo and video recovery. I like it more for previewing results and filtering by file type and date. That saves time when you’re staring at 3,000 recovered files with broken names.
Also, this is a decent quick watch if you want the process in one minute:
watch this quick guide for SD card photo and video recovery
One small disagreement with the usual advice. Formatting after recovery is not always enough if the deletion happened after card errors, random disconnects, or camera freezes. In that case, test the SD card with H2testw or F3 after you back up your files. Fake cards and failing cards are more common than people think. If the test throws errors, retire the card. Don’t trust it again.

You already did the single most important thing, which is stop using the card. @mikeappsreviewer and @viajeroceleste covered the recovery side pretty well, so I’d focus on triage before you throw every tool at it.
First, figure out whether this was plain deletion or the card starting to fail. If the camera had freezes, “card error” messages, missing thumbnails, or random disconnects before this happened, don’t treat it like a normal delete job. In that case, the safest move is to clone the card and work from the copy. If it was just “oops, deleted a folder,” recovery odds are usually a lot better.
One small thing I sorta disagree with: locking the SD card is smart, but some cheap readers ignore that switch anyway, so don’t assume “locked” means truly read-only. Still worth doing, just not magic.
For actual recovery, Disk Drill is a solid choice because it’s easy to preview photos/videos and it handles camera media better than a lot of bare-bones options. I’d use a real card reader, scan the card, recover only to your computer or another drive, and then check the recovered files before touching the SD card again. If your videos come back broken, try a deeper scan instead of restoring the first junk result.
Afterward, test the card. Seriously. A lot of “accidental deletion” stories end with the card being flaky as heck.
If you want more SD card data recovery recommendations, this thread is worth a look: best ways to recover deleted files from an SD card.
Do not format it yet. Not even “quick format.” Thats where people make it worse.