I accidentally lost photos from my SD card after it showed an error and asked to be formatted. These are important family pictures, and I need the best way to recover deleted or inaccessible images without reducing quality or damaging the card further. Looking for safe SD card photo recovery tips or tools that actually work.
I’d check the boring stuff first before touching recovery tools. A lot of “deleted” SD card photos still exist somewhere else, and I’ve seen people get everything back from sync services without doing any card recovery at all.
Start with whatever was tied to the phone or camera. Look through Google Photos, iCloud Photos, OneDrive, Dropbox, Amazon Photos, or any backup app you had signed in. Phones often upload in the background and you forget it even happened. Also open the Recently Deleted or Trash section in each service. Many of them keep removed photos for 30 to 60 days.
If the SD card came from a camera, check the camera itself too. Some models keep part of the media in internal storage instead of writing all of it to the card. I’ve also run into cases where the card reader was the issue, not the card. Swap readers. Try another USB port. Try another computer. It sounds dumb, but I’ve seen it fix the whole thing.
If none of those checks turn up anything, stop using the SD card right away and move to recovery software. This part matters more than people think. Deleted photos often stay on the card until something new writes over the same space. Every new photo, video, or copied file cuts your odds.
I’d begin with Disk Drill. I’ve used it on DSLR cards, microSD cards from Android phones, drone cards, and cards which suddenly showed up as RAW or unreadable. It’s easier to deal with than some of the older tools, and it still handles messy cases better than I expected.
One thing I noticed is it doesn’t depend only on file system entries. A lot of basic recovery apps do fine when files were deleted recently and the card is still healthy. Once the card was formatted, corrupted, or the partition got damaged, those tools tend to fall apart. Disk Drill does deeper scanning and looks for file signatures directly, which helped me pull photos off cards in rough shape.
Here’s the process I’d follow:
- Take the SD card out of the device immediately.
- Connect it to your computer with a proper USB card reader.
- Install and open Disk Drill.
- Select the SD card from the drive list.
- Click “Search for lost data” and pick the scan mode.
- Let the scan finish fully. Deep scans often pull up far more than the quick one.
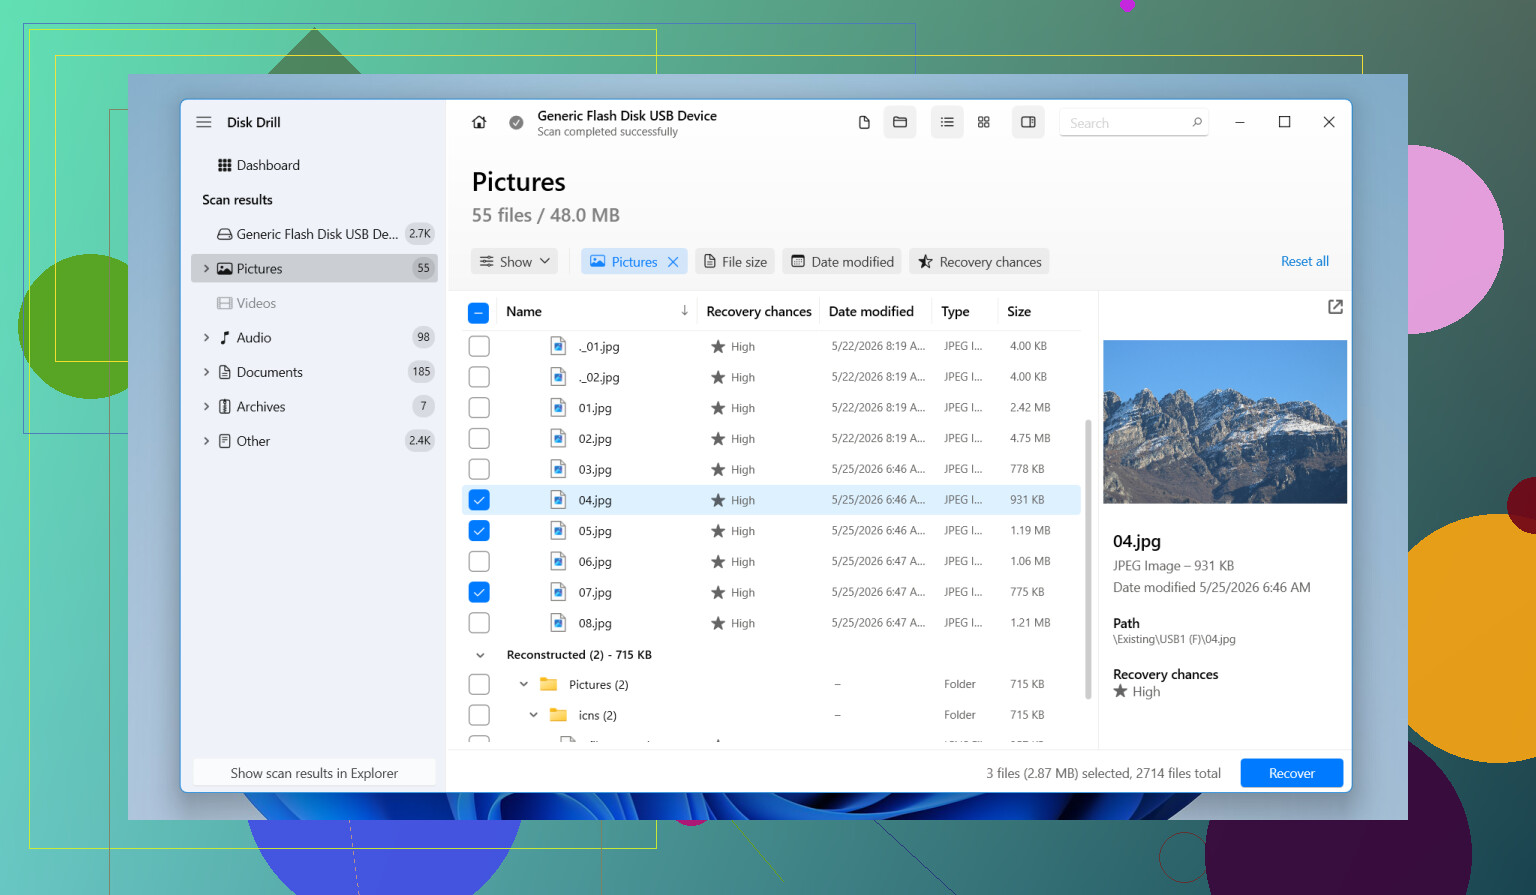
- Open the Pictures section or filter by file type such as JPG, PNG, CR2, NEF, ARW, or DNG.
- Preview the files before recovering them.
- Recover the files to another drive, never back onto the same SD card.
The preview step helps a lot. If a photo opens fine in the scan results, recovery odds are usually decent. Not perfect, but decent. It saves time too, since you get a rough idea of what’s intact before you copy a pile of junk.
It also seems better with camera media than plain undelete tools. GoPro cards, drone cards, mirrorless cameras, dash cams, they often store data in fragments. Some recovery apps miss parts or return broken files. I’ve had better results here with SD cards from cameras than with the older undelete stuff people still recommend in random threads.
The free version lets you scan and preview first, which is useful if you’re trying to figure out whether the card is worth fighting with at all.
If recovery software isn’t getting you anywhere, I’d still check a few other places:
- Look through older backups in Windows File History or Time Machine.
- Check your computer for auto-imported photo folders.
- Try another SD card reader or another USB port.
- If the card keeps disconnecting, gets painfully slow, or appears inconsistently in Disk Management, switch to a professional recovery service.
Once there’s physical damage, software gets a lot less dependable. Repeated scans on a failing card can make things worse too, so I wouldn’t keep hammering it if the card is acting unstable.
1 Like
If the card asked to be formatted, don’t format it yet. I’d also skip repeated scan attempts on the card itself if it keeps throwing errors. @mikeappsreviewer covered backup checks and basic recovery flow, but I’d add one step first. Make a full image of the SD card before recovery. That protects your only copy.
Use a disk imaging tool and save the card as an image file on your computer. Then run recovery against the image, not the card. If the card is degrading, this matters a lot. Photo quality won’t drop from recovery software. You either recover the original file or you don’t. Quality loss happens later if you re-save compressed previews or screenshots. Recover the original JPG, RAW, HEIC, PNG, CR2, NEF, ARW, or DNG files.
Disk Drill is fine for this because it handles SD cards well and previews found photos, but I’d use it on the card image if possbile. Recover to your PC or an external drive, never back to the SD card. Also check file sizes before celebrating. A 0 KB or tiny JPEG is junk, even if the filename looks right.
One small disagreement with the usual advice. Deep scan first is not always best on a flaky card. Image first, then scan. Safer. Less wear. Fewer regrets.
If files come back but won’t open, try a JPEG repair tool only after recovery. Don’t write anything new to the card. For camera-specific tips, this SD card photo recovery tips for beginners thread is worth a look too.
If the card suddenly says “needs to be formatted,” I would not trust it enough to keep poking at it in-camera. Slight disagreement with @mikeappsreviewer here: before even trying a bunch of scans, check the card’s little lock switch and look at it in Disk Management or Disk Utility. Sometimes the card is readable but the file system header is messed up, and that changes what tool works best.
Also, recovering photos does not lower quality. That part gets misunderstood a lot. Recovery software is pulling the original JPG/RAW/HEIC file back. The only time quality drops is if you save previews, screenshots, or recompress the pics later.
My order would be:
- Stop using the SD card.
- Test with a different reader.
- If it mounts at all, copy the entire card as an image first if you can.
- Then scan that source with something like Disk Drill.
- Recover files to your computer, not back onto the card.
What I’d add that @sternenwanderer only kinda touched on: sort recovered photos by file size and resolution before you celebrate. Real camera photos usually have normal sizes. Tiny JPEGs are often broken thumbnails, not the full image. Also check for sidecar and RAW pairs if this came from a camera.
If the card keeps disconnecting, gets hot, or reads insanely slow, stop DIY stuff. That’s where people make it worse, tbh.
For a quick visual explainer, this is pretty useful: SD card photo recovery tips on YouTube Shorts.
Main thing: do not format first, even if the device keeps nagging you. That prompt is basicly bait.
One thing I’d add to what @sternenwanderer, @byteguru, and @mikeappsreviewer said: check whether the recovered files still have their original metadata. EXIF data like capture date, camera model, lens, and resolution is a good sign you got the real photo, not just a thumbnail or cached preview. If a recovered image opens but has weird dimensions or no metadata at all, I’d be skeptical.
I slightly disagree with the “preview means you’re safe” idea. Preview is helpful, but I’ve seen photos preview fine and still come out partially corrupted after recovery, especially from damaged SD cards. Always test a batch of recovered files fully.
About quality: recovery itself does not reduce image quality. If Disk Drill or any similar tool restores the original JPG, RAW, PNG, HEIC, CR2, NEF, ARW, or DNG file, quality is unchanged. The danger is saving exports, screenshots, or re-encoded copies afterward.
Disk Drill pros:
- Easy filtering for photo formats
- Good previews
- Works well on corrupted or formatted SD cards
- Can recover to another drive
Disk Drill cons:
- Not magic on physically failing cards
- Deep scans can return lots of clutter
- Full recovery is paid
If the card appears as 0 bytes, disappears randomly, or makes the system hang, stop software recovery and consider a lab. That’s the point where DIY gets expensive.