I accidentally removed an SD card from my Mac before it finished transferring photos and videos, and now the card is not showing all of my files. I’m trying to recover important deleted or missing SD card data on a Mac and need advice on the safest file recovery steps or tools to use without making things worse.
I’ve had to recover SD cards on a Mac more than once, and the right move depends on what happened to the card in the first place.
If you deleted files by mistake, your chances are usually decent. A quick format is often still recoverable too, since it tends to wipe the file table first and leaves the underlying data sitting there for a while. Things go bad fast after a full format and then more use on the same card. New photos, new video clips, even a few bursts from a camera, those writes start replacing old sectors. If the card is acting broken, random disconnects, heat, mount failures, or your Mac stops seeing it right, software tends to hit a wall.
The worst thing I see people do is keep shooting on the same SD card after the loss. I did this once years ago and it killed half the recoverable files. On a smaller card, even a short session is enough to ruin what was still there.
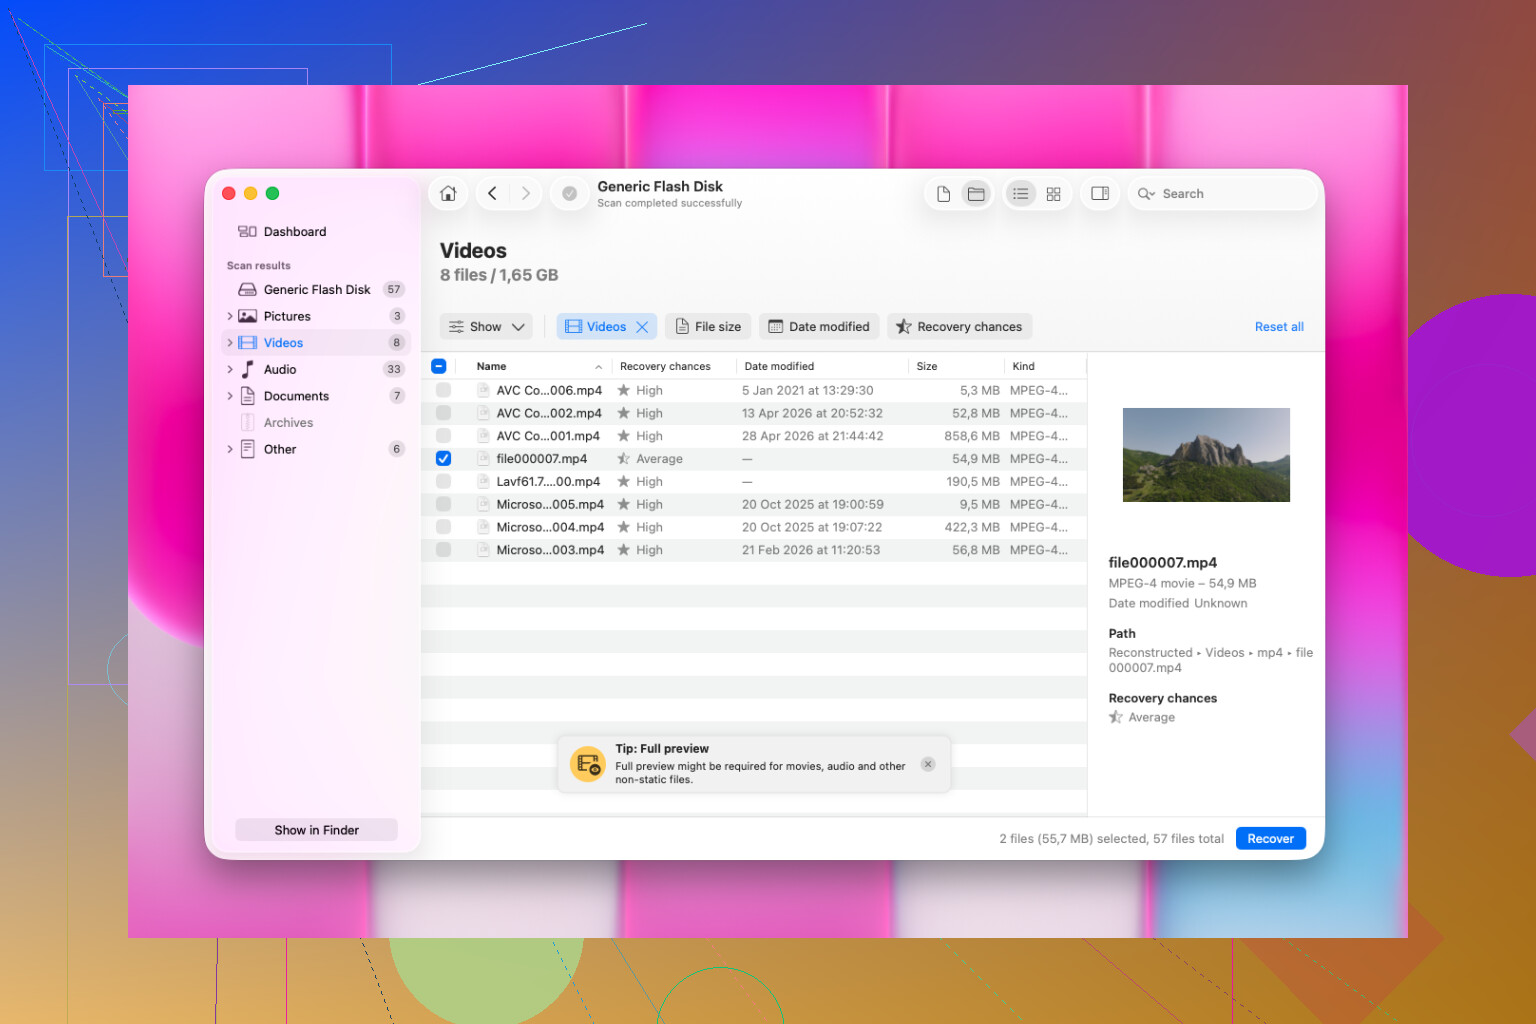
On macOS, I’d start with Disk Drill. I’ve used it next to tools like UFS Explorer and R-Studio, and this one lands in a good spot between easy and capable. You don’t have to fight the interface, but it still does a solid job when the card has real file loss issues.
What I do is simple:
- Put the SD card into the Mac with a card reader
- Launch Disk Drill and pick the SD card from the list
- Run a full scan, not a quick peek
- Wait until the scan is fully done, even if it looks finished early
- Preview the results
- Save recovered files somewhere else, not back onto the SD card
What sold me on Disk Drill was the preview step and how it handles camera file types. It picks up a lot of formats on its own, including RAW images and some broken-up video files cheaper recovery apps tend to miss. I trust the preview more than the file count. If a photo opens cleanly there, or a video scrubs without falling apart, I’ve usually had a good result after recovery.
I also wouldn’t dump out 5,000 files in one shot on the first pass. Grab a small batch first. Open the photos. Check EXIF if you care about metadata. Scrub through the videos for a minute or two. If those test files look fine, then go bigger. Saves time, and it stops you from waiting hours only to find out the batch is junk. Learned tht one the hard way.
1 Like
First thing, stop using the SD card. No more imports, no repair attempts, no copying stuff onto it. When a transfer gets interrupted on Mac, the files are often still on the card, but the directory gets messed up. That is a better situation than a physically dead card.
I agree with @mikeappsreviewer on one part, write activity is what kills recovery odds. I disagree a bit on where to start though. Before jumping into recovery software, check Disk Utility and System Information on your Mac. If the SD card shows up there with the right size, your Mac still sees the hardware. If it does not mount, do not hit Erase or First Aid right away. First Aid helps sometimes, but it also changes filesystem data, wich is not my first choice when photos matter.
My order would be:
- Put the card in a good USB card reader, not the Mac slot if it has been flaky.
- Open Disk Utility, see if the card appears.
- If it appears, make a byte-for-byte image of the card first.
- Run recovery on the image, not on the original card.
Why image first? Because recovery scans hit the card hard. If the card starts dropping reads, you want one stable capture. On Mac, dd in Terminal works, though it is not friendly. If you want easier recovery after imaging, Disk Drill is a solid Mac option and it handles photo and video formats well.
Also, if your missing files were mid-transfer, check both places. Look on the Mac in the destination folder for partial imports, and on the SD card for hidden items. Sometimes you end up with duplicates, zero-byte files, or clips sitting in DCIM but missing from the index.
If the card gets hot, disconnects, or shows the wrong capacity, skip software-first recovery. At tht point, the issue looks more like hardware failure.
For Mac users looking for SD card recovery software recommendations, this thread is worth reading too: best SanDisk and SD card recovery tools for Mac and PC.

I’d actually push back a little on the “try repair-ish stuff first” idea. If the card was pulled mid-transfer, the filesystem may just be out of sync, but every fix attempt risks making recovery messier. @mikeappsreviewer and @mike34 are right about stopping use immediately, that part is non-negotiable.
What I’d do on Mac is this:
- check whether the missing files are only invisible, not gone
- in Terminal, list the card contents with
ls -laif it mounts - look for weirdly named folders, hidden files, or zero-byte files
- copy anything still readable off the card first
- then use recovery software on the card or, better, on an image of it
If you want the practical route, Disk Drill is probly the easiest Mac SD card recovery tool for this kind of mess. Not magic, just one of the less annoying apps for recovering deleted or missing photos/videos from SD cards on macOS. I would focus on previewable files only. If a recovered clip won’t preview, don’t assume it’s fine.
One more thing people skip: check the Photos import folder, Finder recents, and temporary media caches on the Mac. Interrupted transfers sometimes leave half-imported files behind.
Also worth skimming if you’re comparing Mac recovery apps: best Mac file recovery software recommendations from Reddit.
If the card keeps disconnecting or reports the wrong size, stop. That’s less “missing files” and more “dying card,” which is a diferent problem.
I’m with @mike34 and @ombrasilente on one key point: don’t “fix” the card before you know what’s wrong. But I’ll disagree slightly with the software-first angle from @mikeappsreviewer. If the card still mounts, sometimes the fastest win is just bypassing Finder and checking the actual camera folders manually, especially DCIM, PRIVATE, or MISC. Finder can hide a mess that the filesystem still technically has.
A few extra Mac-specific things to try that haven’t really been covered:
- Check
Image Captureinstead of Finder or Photos. It sometimes sees media that Finder import flow misses. - In Terminal, try
diskutil listanddiskutil infoon the SD card. That tells you whether macOS sees a healthy block device even if the volume looks broken. - If videos are missing, look for fragmented files with odd sizes. Photos often recover cleaner than videos after an interrupted transfer.
- If this was a camera card, put it back in the camera once, read-only if possible, just to see whether the camera itself still indexes the media. I would not keep using it there, just test visibility.
About Disk Drill on Mac:
Pros
- easy preview for photos and videos
- good support for common SD card formats
- simpler than some heavier recovery tools
- decent choice if you want to scan an image instead of the original card
Cons
- deep scans can return a lot of renamed files
- video recovery can still be hit or miss if clips were mid-write
- not the cheapest option if you only need a one-time recovery
- easy UI can make people skip the important part, recovering to another drive
My take: if the card is stable and detected normally, Disk Drill is a reasonable Mac option. If capacity is wrong, reads are hanging, or it disconnects, stop messing with apps and think hardware failure instead. That’s where people waste recovery chances.